Tag : flooring

post image

The Basement Before and After

I’ll do a separate post about the long, arduous process. There was a lot involved. The basement deserves two posts. At least two posts. Here’s one.

bsmt-before-bar-corner

basement-long-view

The main difference being that I turned the lights on. And that there were lights that could be turned on. And a ceiling. The before photo does a poor job of showing that there was, in fact, no ceiling.

Here’s the other view:

bsmt-before-theater-side

basement-screen-side

At least this side of the room makes the ceiling situation more obvious. The fluorescent fixtures didn’t totally work. Occasionally they would work, though usually only one at a time. They were vexing, then they were eliminated. Let that be a warning to future light fixtures.

And, yes, I know there’s still blue tape on the window.

More details in another post probably.

bkd

Kitchen Floor: Slated

Still needs to be washed another 30 times and then sealed (twice? we’ll see), but otherwise it’s done. Enjoy the photo retrospective. Or not, whatever works for you.

What the in-store sample tiles looked like.

It wasn’t very gauged, either.

The dry run. Also on the floor: a hammer, wire strippers, small wonder bar, four-foot level, joint tape, and a Dremel.

Thinset.

It’s like an under-utilized veterans’ cemetery where there was in-fighting about what direction the crosses should face.

Spray away, buddy.

All done but the grouting.

The float at work. I’m not sure in what sense it “floats”.

Semi-dry grout awaiting clean-up.

Light’s green, trap’s clean.

It occurs to me that life is like a box of slate tile: (1) you never know what you’re going to get; (2) even once you see what you have, you have no idea the ramifications of it or how it’s all going to work out; (3) then you cement them to your floor because, man, you gotta do *something*; and then (4) it becomes permanent and you live with it.

Was also weird to me how different the floor looked before and after grouting. Before: wild, like there were a bunch of rocks on the floor. After: like the floor in some fairy-tale castle. Kind of liked the wild floor better. Maybe I’ll see if I can get a three-inch-deep stream of water to flow over it permanently, that might help.

bkd

PS, Next time I’ll over-order by 25-percent rather than 10.

PPS, Where you see all the dark tiles grouped together, those are the areas getting covered by cabinets and appliances.

Installing the Kitchen Sub-Floor

And underlayment. The problem with this overall house renovation project is that it’s mostly finish work, which is no fun. Finally got to do something that wasn’t finish work. Now I want to go and frame something or shoot some .22 rounds into concrete maybe. Next house.

Not pictured that should’ve been:

  • Dremeling the underlayment to fit.
  • Applying the latex underlayment putty to a couple uneven spots.

It was just the area where the old cabinets used to be and the floor exposed by taking out the wall that needed new sub-floor and underlayment. Took a few tries to figure out what thickness both of those needed to be (19/32 for the subfloor, 5 mm for the underlayment). Learned that all wood screws aren’t the same and that just because two boxes of nails have the exact same description on them, that doesn’t mean they’re the same quality of nail.

And if anyone in the Pgh area needs help installing a new plywood sub-floor, I’d be happy to help.

bkd

Removing Vinyl Tile: A True Story

Maybe it’s just factual, not so much true. Anyway: here’s a video of me removing a vinyl tile from the kitchen floor. I think the video captures 85 to 90 percent of the tension and raw emotion of the live event.

The sound in the background is the fan in the living room. It’s 95 degrees outside and I don’t have air conditioning is why. Some of the tiles came off more easily than this one and some were more difficult. I finished about half the floor, but wanted to leave a race track around the edges so I can paint without having to walk on glue residue. The word “residue” seems underutilized.

bkd

I Love the Smell of Polyurethane in the Morning

Smells like… victory. Seriously.

First coat.

The finished wood doesn’t actually look as dark as this.

Now I just gotta wait another 72 hours for it to cure. Depending on the lighting, I either really like the natural wood (no stain) look or have continued misgivings about it. Natural light: looks great. Artificial: misgivings. It’s unfair to judge until it’s all settled and done with anyway.

I’ll do some sort of floor refinishing post-mortem some time after the 72 hours are up. While I’m waiting for it to dry, I’ll probably go back into the kitchen for a day or two and see if I can get rid of the rest of the tiles and pull the sink cabinet out (the tricky part is that the pipes have grown up through the bottom of it), then it’ll be back to the living room and bedrooms. On deck there:

  • Paint prep (patching, spackling, sanding, removing plates and vents, removing light fixtures, taping, laying ground cover).
  • One coat of Kilz on every surface I can find that isn’t a floor or window.
  • Paint ceiling (flat white).
  • Paint walls (hoping to find the same green I had in NYC).
  • Paint trim (white).

That should take care of next week.

bkd

Dismantling the Faux-erplace

It was the wackiest thing in the house, bar-none, and now it’s just a Kilz-swipe away from complete extinction. In a sense, I feel bad about destroying such a one-of-a-kind design element. In another sense, not so much. Before vs. after:

The cool thing is that if I reversed the order of the photos, it’d still look like I’d done something.

Yeah, all I did was knock the “mantle” part off of it. But still. Took at *least* 20 minutes. Prior to destruction, I showed this feature to a guest.

Her: They just painted the wall like a fireplace.

Me: Yeah.

Her: But it’s just a cold air return.

Me: Yeah.

Her: So what were they…?

Me: Yeah.

Her: Oh.

Me: Yeah.

In a few days, Kilz ftw.

Other than that, yesterday was another day of sanding and shop-vac’ing. You can’t tell me this doesn’t look like fun:

Unless you want to, then you can.

Here’s a run-down of sanding:

Drum Sander: 2.5 days.

Edge Sander: 1.5 days.

Orbital + Finish Sander: 2 half-days.

Clean-up with Orbital Sander: 2 hours this morning.

Doesn’t actually look that arduous when it’s typed out like that. OTOH, I blew my nose yesterday afternoon and whatever it was that came out was medium-brown.

bkd

Plugger of Holes, Douser of Stains, Demolisher of Closets

Woke up late. Went to the Home Despot twice (twice!) to buy hoses for my new used dryer only to find out I got a gas leak in that system somewhere (should I shut the gas off? no, I’m sure it’s harmless). Don’t imagine that’s all that interesting. But filling nail holes with putty?

Spellbinding.

I’m also pursuing the sisyphusian, er, pursuit of filling all the edges of the floor (the part that runs up against the baseboards) so that I can leave the toe plate off. Unfortunately, this floor was laid down with the then-firm knowledge that there’d be another round of molding added to the system, so they just left gaps (you can see one in the photo above). We’ll see how it works out. They should sell wood putty in bigger tubs — I’ve been through two already and will probably need at least a couple more tomorrow.

And then, since it seems like I’m probably going to leave the floor natural (and not stain it), I’m trying to get rid of the last holdout of a urine stain in the house. I guess hydrogen peroxide is supposed to be good for that, but that it can take many days. Hrm.

Today is day two.

Fortunately, the peroxide in this bottle is topical.

I want to get these floors done. I’m tired of living in the basement like a common troll. I might pronounce this stain “light enough” pretty soon. It’s getting a little lighter. It’s about 3″ x 3″ and it’s behind the door in the big bedroom, so it’s not something that you’d likely see very often. Yeah, I dunno. We’ll see how it goes.

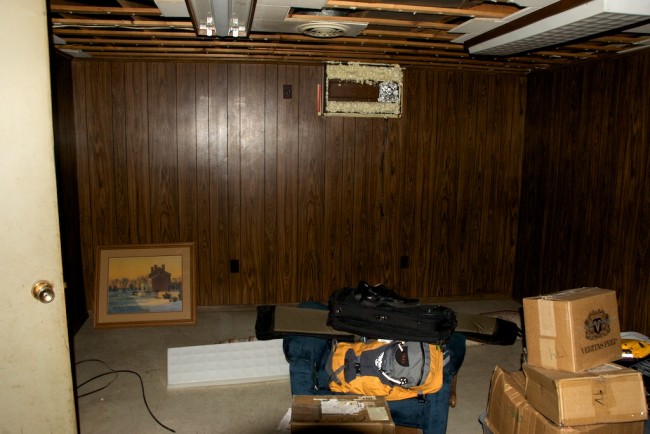
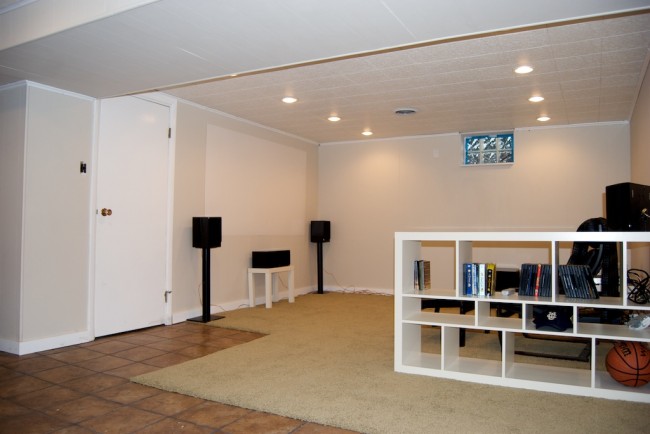
As for the closet — all the bedroom closets are standard 1958 in arrangement. They have a shelf with a hanger rod underneath. They’re all in decent shape, but I need more clothes storage space, so I gotta do something better in the big bedroom closet. Here are before and after the removal of hardware:

The main difference is the addition of the stepladder.

It was in there pretty good and 52-year-old nails don’t necessarily like getting pulled. You can also see “Brian’s Bane” in there — that gray stuff coming down from the ceiling on the back wall of the closet. Pretty sure that’s from water damage from some time in the (distant?) past (the plaster has peeled off the old-school “drywall”). The back wall I can just mud over, but the ceiling is pretty screwed up all the way through to the insulation. I’m thinking I might have a guy put (modern) drywall up there or something.

Bought one of those Rubbermaid closet organizers off of Amazon for it. I bought the deluxe organizer instead of the standard one. Couldn’t for the life of me tell what the difference was, aside from the deluxe one being $10 cheaper for some reason. But if I have to wait for a new ceiling, it’ll probably be a while before it gets installed (and I’ll probably move upstairs into the #2 bedroom instead of the “big” one).

I should probably get myself to back off a little, but I’m really stoked on this idea of moving upstairs soon. I’m sort of hoping over the upcoming weekend. That’s probably aggressive, but all I have to do is: plug more holes in the floor tomorrow (where the shoe molding used to go), sand the corners and the putty fill, three coats of urethane, paint the baseboards, paint the ceilings, and paint the walls.

Yeah. Maybe the following weekend.

bkd

How to Remove Shoe Moulding

It’s pretty easy.

Tools needed:

  • Scraper/Putty Knife (3-inch or so).
  • Small Wonder Bar/Pry Bar (6-inch or so).
  • Hammer (normal variety).

Step 1: Jam the scraper between the shoe moulding and the baseboard and wiggle it loose. If you’re lucky, the shoe moulding will come off completely.

2. If you’re less lucky (this is usually the case), you’ll have to pry it off the rest of the way. Position the wonder bar over each nail and pry the shoe moulding back until it becomes un-attached at the nail (the nail may stay with the shoe moulding or it might stick with the baseboard). Keep going until the shoe moulding piece is removed completely.

3. You’ll probably still have nails attached to the base board, but they’ll be too low to the ground to get your hammer claw around them. So work them looser with the wonder bar (they *might* come out with the wonder bar) and get the heads up off the ground so you can get the claw on them.

4. Remove the nails with your hammer.

And, just like that, your shoe mouldings have been removed. Well done. Well done.

That’s about as uninteresting a blog post as I can muster. Now to see if it works as search engine bait…

Ominously,

bkd

PS, I probably should have taken these off before using the drum sander. I didn’t. The world turns even still.

PPS, FWIW, I’ve decided not to put the shoe mouldings back. It’d take work, I’d have to get a finish gun, and I kind of think they’re ugly anyway. I’ll just have to wood fill the few places where there are gaps between the baseboards and the floor boards.

Dark Day of the Edge Sander

The good news is that I’m now completely done sanding my floors I still have a lot more sanding to do.

In the meantime, here are ten infuriating things about the edge sanding experience:

  1. I don’t think that thing has more than a square inch of actual sandaper-meets-floor surface on it.
  2. The pig tail cord came out constantly.
  3. Running that thing within the confines of a 2′ x 3′ coat closet left my ears ringing.
  4. This position for a day (plus a few hours):
  5. The dust-catch bag kept falling off (which resulted in the thing shooting dust straight into my face).
  6. Sometimes it doesn’t want to go in the direction you’re pushing it.
  7. Left some really nice circular divots in the hallway.
  8. The inflating dust-catch bag was always in the way.
  9. Sometimes it catches something and goes shooting off in a given direction, banging your knuckles against a wall.
  10. When you’re done, it doesn’t look like you accomplished all that much.

Yesterday was probably my least favorite day I’ve had since I quit Toshiba. Granted, the competition for that designation has been less than stiff (yes, edge sanding my floors was less fun than rafting down the Tuolumne, hiking in Acadia, and fishing in Minnesota — shocking), but still. I mean, it’s been 11 months. Worst activity in 11 months!

I was thinking on Thursday that, no matter what I did Friday, I wasn’t going to do more sanding. And then I got to the Home Despot on Friday and figured that since I was there (at the location with the tool rental), I might as well just rent the edger and finish up the rooms. How hard could it be? Yeah.

Nemesis:

Rental Edge Sander from Home DepotParked at the corner of Sanded and Unsanded.

My guess is that Home Depot’s edge sanders might not be the best specimens, but it’s what I had available. And now I still have to clean everything up with my orbital sander anyway. It won’t surprise me to find out that the orbital sander would have been better than the edge sander in the first place (at any rate, I know all 3.1415*(2.5^2) of surface area do work on my orbital). Then I probably have to hand-sand the deepest corners. It’ll be arduous. It’ll be back-breaking. It’ll be bloody (unless I wear gloves).

C’est la guerre.

bkd